11 Things for the Ultimate Nesting Checklist
Welcome to the tree, mama bird! It’s time to nest. This was something I knew about in concept before I had a baby but I simply cannot explain the strength of the urge to remove every spec of dust, wash every available surface, and finish every house project that has even crossed your mind in the last 5 years in a mere 3ish months. Suddenly, all that energy you got back in the 2nd trimester is being used to climb on a chair to wash the tops of your cabinets or crawl on your hands and knees to scrub the baseboard that is behind the couch.
Honestly, the mental load it takes to have a constant list of things to get done going through your head every waking hour accompanied by the fact that you know most of it won’t get done and topped off with the fact that you’re “technically” not even supposed to be doing half of it yourself is probably where the exhaustion of the 3rd trimester comes from. Well, that and, ya know, the giant lead basketball that is on your abdomen.
Lucky for you, you’re in the right place. By the grace of God, you have stumbled across the Ultimate Nesting Checklist. This will likely be one of the most thorough lists you will find thanks to the fact that I am type A, an oldest child, and an overthinker. I spent MUCH more than the final weeks of pregnancy obsessing over every piece of the interior and exterior of my home and documented it to a T to better help you hone in on the most efficient and thorough way to get it all done (all being a relative term because, let’s be honest, the chances of you actually feeling content with your space is slim to none).
I would also like to make note of the fact that my house was a literal construction zone. Not in the cutesy way that someone says “pardon the mess” when there are a couple of dishes in the otherwise sparkling sink. I mean a LITERAL construction zone. We bought a house straight out of 1960 less than 1 year before we had our baby and did a total remodel of the main floor followed by completely finishing the otherwise bare basement.
At the time that my nesting really started to kick in, we were sealing the foundation so everything from the basement got moved up to my living room. I was quite literally climbing over mountains of boxes and furniture just to be able to sit on my couch (which was also buried). Mind you, this wasn’t even a comfortable couch but rather my husband’s “bachelor couch” as it is lovingly referred to. He had this thing for 7 years. It moved 4 times with him. He loved to sleep on it. It was a pretty cost-effective couch to begin with. Needless to say, as a result of my nesting it was sold and replaced with a much nicer sectional!

Blessings come in all sizes as, with the help of a small village (my friends, missionaries I work with, and family) we were able to do a complete 180 of my house and truly make it a home! Another benefit to this entire process was that our Salvation Army is now inundated with any home goods you can possibly think of, courtesy of Moi.
Some of these things may or may not apply to your home/environment/situation/or desires. That is ok! My only goal here is to structure it in a way that makes it less overwhelming for you. It’s exhausting to take on the mental load of preparing a home for a baby, let alone being pregnant while you do so. As much help as your significant other is, the biological urge just isn’t quite there like it is for you. Blame the hormones. Blame the fact that your husband’s idea of “sparkling clean” is your idea of “meh, it’ll do I guess.” Blame whatever you need to. But blame me for helping you out! There are likely things I missed as well as they do not pertain to my situation so they never even crossed my mind. But I feel I have pretty standard spaces (living room, kitchen, dining area, bedroom, and bathrooms) so, while I may not have a foyer or office, I have enough to get your more used spaces up to par for your little peanut!
Let us begin:

1. Deep clean all bedrooms, the living room, and the kitchen – pretty much any space baby will be!
Baby’s immune systems are pretty much nonexistent for the first few weeks. In fact, it doesn’t mature until they are 2-3 months old. Now, that’s not to say that they should be kept in a sterile environment with no contact with people. However, dust, hair, and grime can trigger small reactions in adults that are magnified in babies. They do keep mom’s antibodies for a few weeks/month after birth so this helps as will a good, general deep clean of these common areas. For a more detailed checklist, see my Room by Room Cleaning Checklist!

2. PURGE!
This is the perfect opportunity to get rid of anything that you no longer use/need/want. All the things. The one thing I will note here is that you should be careful with getting rid of clothes that don’t quite fit pre-baby since your body will look different postpartum. If something was a little too large before, it may fit you really well after! However, if you don’t like it or it isn’t your style, donate it! Even if it fits later, you won’t feel confident in it and you need all the confidence you can get after birth when you’re learning to love your new body!

3. Wash newborn and 0-3 month clothes.
I would recommend using a mild, unscented detergent. Like their immune system, babies’ skin is sensitive. While it does have microbes (aka skin flora) that help keep their skin healthy. This lasts for a few hours to days after birth so you’ll want to be mindful of anything that could cause irritation afterward. A lot of full-term babies will grow out of newborn clothes relatively quickly. My daughter was in them for a couple of months due to her size (which was really nice because we didn’t immediately have to size up!) so having the next size prepared will set you up for a bit after you come home. I’ve seen “hacks” that say not to wash all sizes because you may not even use them all (babies don’t tend to get dirty unless they blow out – it’s not like they’re sweating) so it will save you time in the long run if you end up not needing them. However, I like to be overprepared (that’s the overthinking I mentioned earlier) so feel free to have a laundry-fest and wash it all! It’s your preference.
I would also recommend washing the changing table cover, sheets, nursing pillow cover, and baby blanket even if baby won’t be in the nursery right away. It will allow you to get the space put together (again, one less thing to worry about early on after coming home!).

4. Meal prep!
I didn’t think as many women had a desire to breastfeed as my husband did initially but, as my pregnancy progressed and I attracted pregnant friends (which is super strange but very enjoyable), I found out that he was right (don’t tell him I said that!). If you’ve done any research on breastfeeding in general, you likely know that it burns 500-700 calories a day. That is why it is SO important for you to have snacks at the ready.
A couple of months postpartum when I was down the rabbit hole that is social media (because, with only one baby, what else was I doing with my maternity leave besides living as a couch potato), I was a tip that you should eat/drink when baby does, sleep when they do (ha), etc. While the sleep thing is a pipe dream for most, the food and water this is not. Invest in a big ass, insulated cup (with a straw!!) to keep water cold, buy some Gatorade/Powerade/body armor (helps with lactation due to the coconut water!), and make sure you have snacks handy. Even if you have no desire/are not able to breastfeed, you are still going to need to eat!
Meal prep actual meals as well. It will help alleviate the mental load of “what should we make for dinner” which is always helpful but especially so if you have other kids! Some of my favorite recipes are linked organized and listed here.
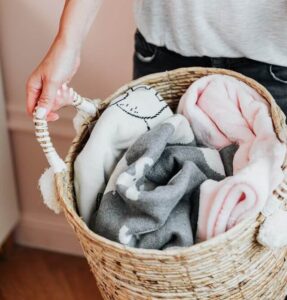
5. Build a nursing cart.
I feel like people have mixed feelings about the benefits of this. I’ve also seen people do just a diaper caddy that can be conveniently moved. Personally, I think our caddy was a lifesaver! I could roll that thing to wherever I was (so many seats to choose from on our new sectional!!) And easily be able to grab whatever I needed. This was beneficial even while my husband was on his 2 weeks of paternity leave because, as is detailed in my Birth Story, he was recovering just as much as me this time. For more details on what could go on this cart, look at my What to put on your Nursing Cart List!
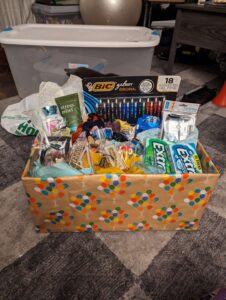
6. Put together a nurses’ box.
Another one I feel is controversial. While I would agree that this one isn’t TECHNICALLY necessary (necessary being subjective anyway), it was something I enjoyed doing because it was more of a “fun” project. Plus, our nurses LOVED it and were so appreciative. After someone sees you push a child and then some out of your body (or helps you through the inevitable wrench in your birth plan, whatever that may be), it’s nice to be able to do something for them! For details on what I included in mine as well as input from various nurses on what they would, take a look at my Guide to a Nurses’ Box list. A note: this can be kept super cheap if you don’t have a whole lot of extra money (it’s not like you’re having a baby or something expensive, pshh).
7. Get small projects done!
Anything that will take less than 30 minutes to complete – get ‘er done! Been meaning to hang a picture? – do it! Need to organize the junk drawer? – do it! Need to wash the guest room sheets? – do it! Getting small, easy tasks done makes you feel more productive and they never usually take as long as you think they will in your head anyways. An even more manageable way to break this down is to aim for 1-2 tasks a day.
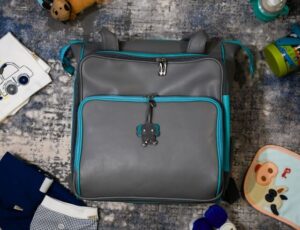
8. Pack the diaper bag.
This one is pretty straightforward forward and, while the hospital will have diapers and wipes available, it will ease your mind to have this done. Plus you will need it ready whenever you plan to venture out after coming home! I have a list of what should go in there – you can find it here.

9. Build any and all baby items.
Crib/bassinet. Changing table. Bouncer/swing. Stroller. Dresser. Diaper genie (do you build those??). Rocking chair. Highchair (if you really want to be prepared).

10. Pack the hospital bag.
At the end of the day, this and the last item are the only 2 things that matter. You need to have what you need at the hospital and you need to have a way to bring baby home! This task is one of those that seems like it will take forever but really doesn’t. Don’t stress about bringing the right things either. Social media will tell you that you need a custom labor gown and designer slippers and all the hygiene products in the world. Really, all you need is something for you and baby to come home in and maybe something comfortable to wear after baby is here and you’re sick of the hospital gown. I have a realistic, minimalistic list here! If you are the kind of person who wants to pack extra to make things more homey, be my guest. That is just not personally my thing.
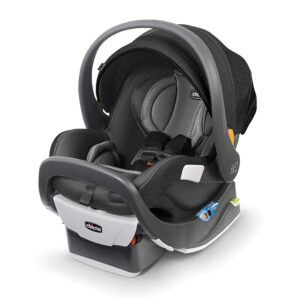
11. Install the car seat (and other car things).
I recommend getting this done relatively early in the 3rd trimester. It’s so crazy to think that, at any given moment, you are a few hours/days away from your little one being here! A couple pieces of advice: every car seat is different but I am almost certain that all bases have the option of being anchored in or strapped in with the seatbelt. However, only do ONE of those things! The user manual will give you the specifics on how to do this but, doing both, while seems like it would be more secure, is actually more dangerous as it puts too much tension on the base and can lead to cracking.
Additionally, install the base and know how the car seat clips/unclips in but DO NOT drive around with the car seat until you are on your way to the hospital. If (God forbid) the seat is in the car for anything more than a minor crash, it is junk and you will need to replace it (see more details here). That would defeat the purpose of decreasing the stress of installation if you have to buy another car seat that potentially won’t be here by the time you have the baby!
Hopefully, this helps you feel more prepared for baby. Like I said, you will never feel 100% ready (if you do, please let me know how you achieved it so I can strive for it!) but you can at least feel better prepared. At the end of the day, all baby needs is your love! And the fact that you’re even looking into this and read this whole article means you already care so much – what a lucky little babe!


